A picture is worth a 1000 words

A picture is worth a 1000 words

Canvas Scrapbooking

Friday, June 12, 2009

It is a lot of fun to alter and scrap on a canvas. It is also a great gift to make for someone else.

I did a class with a lady called Anna-Karin over last weekend about Textured Canvas Scrapbooking. We made a canvas with a lot of texture and using different paint techniques.


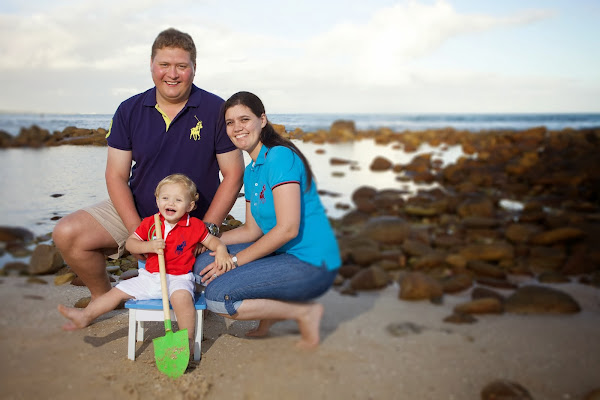
I started with one on Friday. But to me it was not that big a success. The final product is growing on me... I was a bit disappointed. The picture I took to put on the canvas are one of my wedding pictures, and it's a very special picture. But in the end I used another picture on the flop one and on Saturday, I made a second one, which I love!!!!!!!!!!!!!!!!!!!!!!!!!!!!!


Tutorial: Textured

Supplies:
  • Canvas
  • Gel Medium
  • Acrylic Scumble Glaze
  • Acrylic Paint (white/cream and a dark brown)
  • Patterned Papers
  • Embossed Patterned Papers
  • Chipboard Embellishments and Letters
  • Die-cuts

Method:

  1. Paint the canvas with a thin layer of cream or white paint, the edges are the most important. If you want to you can paint some of the chipboard pieces too. Let it dry.
  2. Cut and tear up the different patterned papers and embellishments and place them so that they cover the entire canvas. They should overlap a bit. If you have decorative scissors, you can use them on a few of the edges. The goal is to get a lot of interesting texture. Don't worry if the colours or patterns don't seem to fit together.
  3. Collage the papers and embellishments onto the canvas using the gel medium. Simply paint a layer of the gel on a part of the canvas and palce the papers on top of it. Make sure there are no air bubbles underneath and press down the edges of the paper. Continue to the next section. Let it dry.
  4. Do the same with the embellishments and the title. Let it dry.
  5. Paint the entire canvas with the gel medium once or twice. Make sure that everything is firmly adhered. Let dry in between and after.
  6. Mix a bit of white and cream paint, and add about the same amount of scumble glaze. The amount of scumble glaze depends on the thickness of the paint and on how transparant you want the mixture to be. Scumble glaze makes the paint a bit transparant and also gives you more time to play with the paint as it dries slower.
  7. Paint the paint mixture over the entire canvas. If there are any areas that you think got too much paint, use a cloth or a paper towel to carefully wipe off some of the paint.
  8. Mix about 1 part brown paint, 2 parts scumble glaze and 3 parts water. Paint this over ther entire canvas and leave it for a minute or tow. Rub off most of it with a cloth. Leave it in some places to add dimension. Let dry.
  9. If you want to, add a rub-on or two. Stamps also work great.
  10. Adhere your photo to the canvas.
  11. You can also embellish the edges of the canvas with rub-ons, journalling, stamps, etc
  12. Add a hook to the back. Enjoy!

This is what the "flop" looks like:


And the pretty one!!!!!!!!!!!!! (as you can see this one is a whole lot nicer than the first one!)


Happy Canvas Scrapping!

Yummie!!!!!!!

Thursday, June 11, 2009

Here are some devine recipes that I got on Facebook for all those chocolate fanatics, like myself!

Chocolate and Mint Tart with Creme de Menthe Cream


Ingredients (serves 6)
  • 3 eggs
  • 160ml thickened cream
  • 60g good-quality dark chocolate, melted, cooled
  • 2tbs cocoa powder, plus extra to dust
  • 40ml (2tbs) creme de menthe, plus extra to serve
  • Whipped cream and mint leaves, to serve
Pastry
  • 225g plain flour
  • 40g icing sugar
  • 125g unsalted butter, chilled, cubed
  • 2 egg yolks
Method
  1. To make the pastry, place the flour and icing sugar in a food processor and mix for a few seconds to combine. Add the butter and process until the mixture resembles fine breadcrumbs. Add the egg yolks and process until the mixture comes together to form a ball. Wrap in plastic wrap and refrigeratge for 30 minutes.
  2. Roll out the pastry on a lightly floured surface and use to line a 23cm loose-bottomed tart pan. Refrigerate for 30 minutes.
  3. Preheat the oven to 180C.
  4. Line the pastry shell with baking paper and fill with rice or pastry wieghts. Bake in the oven for 10 minutes. Remove paper and weights and return to the oven for five minutes until dry and crisp.
  5. Place the eggs, cream, chocolate, cocoa and creme de menthe in a bowl and beat to combine. Pour into the tart shell and bake in the oven for 25 - 30 minutes until just set. Set aside to cool (don't refrigerate).
  6. Swirl a little extra creme de menthe through the whipped cream. Slice the chocolate and mint tart and dust with cocoa powder. Serve with the cream and garnich with a few mint leaves.

Choc-chip Pudding with Jam and Creme Fraiche


Ingredients (Serves 4)
  • 120g unsalted butter, softened
  • 120g caster sugar
  • 1tsp vanialla extract
  • 2 eggs
  • 120g plain flour
  • 60g cocoa powder
  • 2tsp baking powder
  • 60g dark chocolate, finely chopped
  • 1 cup raspberry jam, warmed
  • Creme fraiche or mascarpone, to serve
Method
  1. Grease a 1-litre pudding basin.
  2. Cream butter and sugar in bowl of an electric mixer, add vanilla, then add eggs, one at a time, beating after each until just combined. Sift floar, cocoa and powder and add to mixture with enough water (about 1-2 tablespoons) to make a dropping consistent. Stir in chocolate, then spoon mixture into basin. Make a pleat in the centre of a sheet of baking paper (to allow for expansion) and use to cover pudding. Secure with string, then cover with foil.
  3. Place basin in a saucepan and add enough water to come halfway up the sides, then bring to the boil over high heat. Cover, reduce heat to low and steam for 2 hours. Remove basin from pan and set aside for 10 minutes. Turn out, cut into slices and serve with warmed jam and creme fraiche.
Here are the rest of the names and pictures, the recipes will have to wait.... Just making sure I make you come back for more..... Sorry, am I mean?!?!?!?!

Choc-a-Block Trifle


Ingredients (Serves 6)
  • 4 good quality chocolate brownies (about 85g each)
  • 1/4 cape (60ml) Kahlua (or other coffee liqueur)
  • 275g dark chocolate, roughly chopped
  • 3 egg yolks
  • 1 1/2 tbs caster sugar
  • 1 tsp cornflour
  • 600ml thickened cream
  • 150g white chocolate, roughly chopped
  • 1/4 cup (30g) toated chopped walnuts
  • Dark chocolate curls (see note), to decorate
Method
  1. Break up brownies into small pieces and place in the bottom of a 1.5 litre dish or 6x1 cup (250ml) serving glasses. Drizzle over the Kahlua, then set aside.
  2. Place dark chocolate in a heatproof bowl set over a saucepan of gently simmering water (don't let the bowl touch the water). Allow to melt, then stir very gently until smooth. Remove from heat and add 225ml boiling water, 1 tablespoon at a time, stirring to make a sauce (don't add water more quickly or the chocolate will 'seize' and become grainy). Pour sauce over the brownies, then cover and chill for 2 hours.
  3. Meanwhile, beat the egg yolks, sugar and cornflour together in a bowl with electric beaters until thick and pale.
  4. Heat 300ml of the cream in a saucepan over medium heat until just below boiling point. Pour the hot cream mixture over the egg mixture, stirring to combine. Transfer to a clean saucepan and place over low heat. Stir for 2-3 minutes until a thick custard forms.
  5. Place two thirds (100g) of the white chocolate in a heatproof bowl. Pour the custard into the bowl, stirring until the chocolate is melted and the mixture is well combined. Cool completely, then poor over the chocolate brownie base. Chill for 2 hours.
  6. Place the remaining 50g of white chocolate in a food processor with the walnuts and pulse until fine. Whip the remaining cream to soft peaks, stir in the walnut mixture, then spread over the trifle. Chill for at least 2 hours until set, then servedecorated with chocolate curls, if desired.
Notes and Tips
  • To make chocolate curls, melt good quality chocolate in a heatproof bowl set over a pan of gently simmering water not letting the bowl touch the water. Spread evenly on a flat board or baking tray, then refrigerate until set. Use a sharp knife to carefully shave off curls. Refrigerate until needed.

Chocolate Cake with Caramel Frosting

Preparation time 20 minutes
Cooking time 45 minutes
Ingredients (Serves 12)
  • Melted butter, to grease
  • 200g butter, at room temperature
  • 155g (3/4 cup firmly packed) brown sugar
  • 1tsp vanilla extract
  • 2 eggs, at room temperature
  • 265g (1 3/4 cup) self-raising flower
  • 35g (1/3 cup) cocoa powder
  • 185ml (3/4 cup) milk
  • 70g (1/2 cup) pecans, coarsely chopped
  • 100g (1/2 cup) caster sugar
Caramel Frosting
  • 250g butter, at room temperature
  • 100g (1/2 cup, firmly packed) brown sugar
  • 2tbs golden syrup
  • 1 tbs milk
Method
  1. Preheat oven to 180C. Brush a round 22cm (base measurement) cake pan with melted butter to lightly grease. Line the base and side with non-stick baking paper.
  2. Use an electric beater to beat together the butter, brown sigar and vanilla in a medium bowl until pale and creamy. Add the eggs, 1 at a time, beating well after each addition until just combined. Sift the flour and cocoa over the butter mixture. Use a large metal spoon to fold in the milk until well combined.
  3. Spoon the cake mixture into the prepared pan and smooth the surface. Bake in preheated oven for 40 minutes or until a skewer inserted into the centre comes out clean. Remove from oven and set aside for 5 minutes before turning onto a wire rack to cool completely.
  4. Meanwhile, to make the caramel frosting, use an electric beater to beat together the butter, sugar and golden syrup in a medium bowl until light brown and fluffy. Add the milk and beat until well combined.
  5. Use a large serrated knife to cut the cake in half horizontally. Place the bottom half of teh cake on a cake stand or serving plate and spread with half the caramel frosting. Top with the remaining cake and spread with the remaining caramel frosting.
  6. Sprinkle the top of the cake with pecans. Place the caster sugar in a medium frying pan and stir o er low heast for 3-5 minutes or until sugar dissolves and caramelises. Remove from heat. Set aside for 2-3 minutes or until bubbles subside and toffee cools slightly. Use a spoon to drizzle cake with toffee.

Chocolate & Cinnamon Flan

Chocolate and cinnamon are a favourite combination in Mexico.
Preparation time 20 minutes
Cooking time 60 minutes
Ingredients (Serves 8)
  • 215g (1 cup) caster sugar
  • 60ml (1/4 cup) water
  • 500ml (2 cups) milk
  • 100g dark cooking chocolate, coarsely chopped
  • 6 eggs
  • 1 x 395g can sweetened condensed milk
  • 1/2 tsp ground cinnamon
  • 1/2 tsp vanilla extract
  • Strawberries, washed, hulled, quartered, to serve
Method
  1. Preheat oven to 160C. Line the base of a large baking dish with a tea towel, folded to fit.
  2. Place the sugar and water in a medium saucepan over low heat. Cook, stirring, for 5 minutes or until the sugar dissolves.
  3. Increase heat to medium and bring to the boil. Cook, without stirring, occasionally brushing down the side of pan with a pastry brush dipped in water, for 7 minutes or until golden. Use an oven mitt or tea towel to hold a round 20cm (base measurement) cake pan with one hand. Pour in the caramel and swirl to coat the base and 2cm up the side. Set aside to cool completely.
  4. Meanwhile, place the milk and chocolate in a medium saucepan over low heat. Cook, stirring for 4-5 minutes or until the chocolate melts and the mixture is smooth.
  5. Whisk together the eggs, condensed milk, cinnamon and vanilla in a large bowl. Gradually add the chocolate mixture to the egg mixture, whisking constantly. Place the cake pan in the lined baking dish. Pour the custard mixture into the pan. Pour enough boiling water into the dish to come halfway up the side of the pan. Bake in oven for 40 minutes or until just set.
  6. Carefully remove the cake pan from the baking dish. Set aside for 40 minutes to cool. Place in the fridge for 8 hours or overnight to chill.
  7. To serve, run a flat-bladed knife around the edge of the pan. Carefully turn the flan onto a serving plate. Cut wedges and serve with strawberries.
Chocolate and Hazelnut Mousse

Broken Heart Chocolate Puddings with Mocha Sauce

Bittersweet Chocolate Mud Cake

Chocolate Hazelnut Cake

Chocolate Mousse Cake

Bowls of Hot Chocolate

Blackforest Cheesecake

Triple Chocolate Cheesecake

Oh my word...

It has been ages since I was last here. so much has happened since the last time I came to blog. It is scary. And the worst part is, that the last time I blogged I had just come back form Christmas holiday. Now it is already June... It is terrible how time flies. Before you know it the year is done with...
Lets try and catch up. One thing at a time.
Let me start with February. A lot happened - it was Valentines Day as well as our first wedding anniversary. Here are some pics...


These pictures have luckily been scrapbooked. (Will download them later...) So even though I have not had time to blog. I do however make time to scrap...
 
Support : Creating Website | Johny Template | Mas Template
Copyright © 2011. Jeaunes - All Rights Reserved
Template Created by Creating Website Inspired by Sportapolis Shape5.com
Proudly powered by Blogger